Publishing a VM in Azure is not as easy or simple as we had hoped. After much back and forth between marketing people, DevOps and a couple of our developers we finally got it right! The biggest component we never factored in was just how long it would take from start to finish. Microsoft has to certify (understandably) every step and change along the way to make sure that the quality of the offers in their marketplace is top notch. But this means that there are a lot of hoops to jump through to finally get your little (big) nod of approval to publish your hard work in their store. It’s totally worth it though, having your platform available in the cloud is definitely a must. Enough of this talk, let’s get to the good stuff.¹
Creating your virtual machine
First, you need to get 2 things in motion. You should already have a Microsoft account, so next setup the following:
- Become an Azure Certified Publisher
- Get your Dev Centre Account sorted out so you can receive payment and the like
So now we need to get into Azure.
- Got to https://publish.windowsazure.com and enter your Microsoft account details
- Click on the Publish a VIRTUAL MACHINE
- Give your virtual machine a Title
- Click Create new VM Marketplace Offer
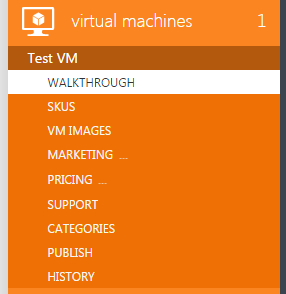
- You should be taken to a screen like this. We need to start from step 3 (assuming Step 1 and 2 are covered as above):

- I personally found it easier to use the left hand menu to navigate and work through each step:
Setting up your VM in Azure: SKUS
- Add at least one SKU
- Choose whether to offer a free trial or not
- Decide how much it should cost
VM Images
- First provision a new VM in Azure. Either by creating a fresh new VM from the Azure store or mounting an existing VM image
- Start and connect to your VM
- Write a script and put it on the drive of the virtual machine which will download and install the latest version of your product automatically. In PowerShell the script for initializing a new VM looks like:
$warewolf_amazon_url = {Some URL to Warewolf’s installer download}
$version_url = {Some URL to download the latest version text of Warewolf}
$client.DownloadFile($version_url, $version_filename)
$client = new-object System.Net.WebClient
# Read the version file into a variable and build the latest EXE installer filename
$version = [IO.File]::ReadAllText($version_filename);
$warewolf_filename =  $setup_folder + "Warewolf-" + $version + ".exe"
$FullUrl = $warewolf_amazon_url + "Warewolf-" + $version + ".exe"
# Download the EXE installer
Write-Host "Download Warewolf $version started..." ;
$client.DownloadFile($FullUrl, $warewolf_filename)
if(-not (Test-Path $warewolf_filename -PathType Leaf) -eq 0)
{
   Write-Host "Download Warewolf $version completed." ;
    # Run the EXE
    Write-Host "Setup Warewolf $version started..." ;
    $arguments ='-s'
    $installerProcess = Start-Process -FilePath $warewolf_filename -ArgumentList>
    $arguments –Passthru
}- Add a scheduled task using the task scheduler in the control panel to run the script on first login
- Once you are satisfied that your script works and that any new user who logs into your VM for the first time (after they’ve waited for your script to execute) will be able to use the latest version of your product
- SysPrep the VM and have SysPrep restart the machine
- Check that your script works and see what the user’s experience will be when they start your VM for the first time
- Make any changes you need to the script to improve user’s first time experience with your VM
- Run SysPrep again but this time have SysPrep leave the machine shut down
- Create a VM image by clicking on the Capture button in Azure:
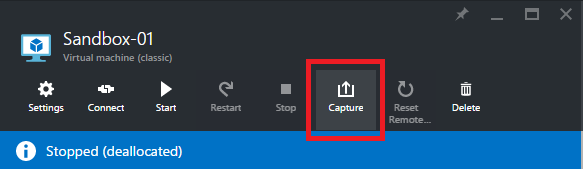
Take note of the storage account you saved the image to.
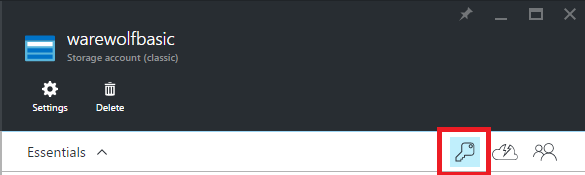
- Get the storage account credentials for that storage account by clicking the Keys button in Azure:
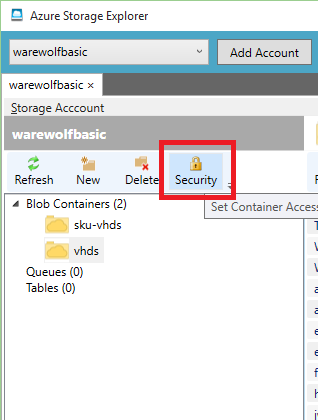
- Download storage explorer
- Log in with the storage account keys you got in Step 11
- Navigate to your captured VM image and select it in storage explorer
- Click Security in the left hand side menu:
- In the Shared Access Signatures tab. The List and Read checkboxes should be the only ones ticked and the dates needs to allow access for three days after this entire SKU is published. So ensure you give plenty of time to get through the next few parts of this guide
- Click Generate. You should get a url that looks like http://(STORAGE CONTAINER NAME).blob.core.windows.net/(PATH ON AZURE)/(VM FILENAME).vhd?sv=2014-02-14&sr=c&sig=(ACCESS KEY)&st=(YESTERDAY’S DATE)&se=(THREE DAYS AFTER SKU PUBLISH)&sp=rl
- Note the sr=c and sp=rl parts, those are necessary and you will fail to publish without them.
- Go back to https://publish.windowsazure.com and select VM Images under Virtual Machines from the menu on the left:
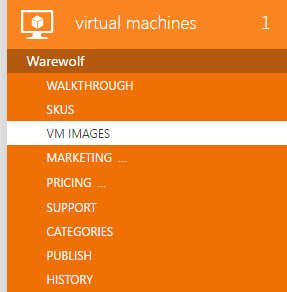
- Copy paste the URL from step 17 into the VIRTUAL MACHINE IMAGES section.
- Fill in the rest of the form.
- Click the Save icon in the top right.
Marketing
This section is where you need your copywriter/marketing person to come in. There is quite a lot of content needed here, like descriptions and images.
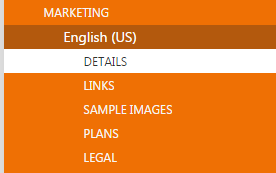
- Click the Marketing link
- Create an Identifier. Remember this should be something descriptive and SEO friendly, as users will use this to search for and find your VM.
- In the Languages section below the Identifier, click English (US)
- Here you need to add the Title, Summary, Long Summary and HTML Description. You also need to add a range of logo and image options in different sizes. Read this page about image guidelines for the Azure Marketplace.
- Using the left hand menu, navigate through the Links, Sample Images, Plans and Legal sections and fill in all your relevant information
Pricing
There are different ways to price your offer and it depends on your currency and country. Our prices are based in USD and we wanted to Autoprice everything based on that. This is a bit of a tedious process as you will need to define the exchange rate you want to use for each country – the auto suggested rates are very out of date. Something to note, at this point in time you cannot change or update the pricing on your VM once it has been published. I really hope this feature comes soon as right now we have to have fixed prices at a fixed rate for all eternity.
- Click the Pricing link in the left hand menu
- Select the country you want to use for your base for all other pricing to pull from
- Fill in all the pricing information for the different plans you have.
- At the bottom of the page click Autoprice other markets based on (country you selected)
- Choose the plans and meters you want to price and click the forward arrow
- Choose the markets you want to price and click the forward arrow
- This is the fun part (note the sarcasm)! I recommend going through each exchange rate to select the rate you want to use. As mentioned above, the rates supplied here are out of date and very inaccurate. Fill these in and select the tick to continue
- Have a mini celebration! You deserve a cupcake.
Support
Microsoft requires you to have a telephonic and online/helpdesk support option for your users. Make sure you have all your details on hand for this section.
- Click the Support button in the left hand menu
- Fill in the Engineering Contact and Customer Support details
- Click the little save icon at the top right
Categories
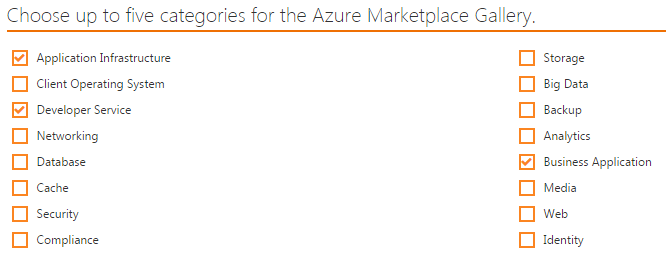
You can choose up to five categories for the Azure Marketplace Gallery.
- Click the Categories button in the left hand menu
- Select the categories that your offer fulfills
- Click save
Publish – getting your VM into the Azure Marketplace
You are now ready to push your offer into staging! This is a compulsory step before publishing. Offers staged in the Azure Marketplace are only visible to specific Azure subscriptions. Make sure you have the which Azure Subscriptions IDs that you want to grant access your offer.
- Click the Publish button in the left hand menu
- Click the Push to staging button under the Staging section
- Add the Azure Subscription ID and click the little plus icon
- Click the tick button to push your offer into staging. This may take 1-2 days before you can access it. You will not get any notification, so keep checking in the Publish Section
Once your offer has been staged, and you are happy with it, then you are ready to Publish. Again this may take a few days and you will need to keep checking in.
- Under the Production section click Request approval to push to production
- Once your offer has been approved, you will see it as Listed in the status section
- Click the Microsoft Azure Gallery listing link to search for your offer
- Congratulations! Your offer is now in the Azure Marketplace.
 ¹ This information is correct at the time of this post being published. We accept no responsibility for any change to this process or undesirable outcomes.


Leave A Comment?