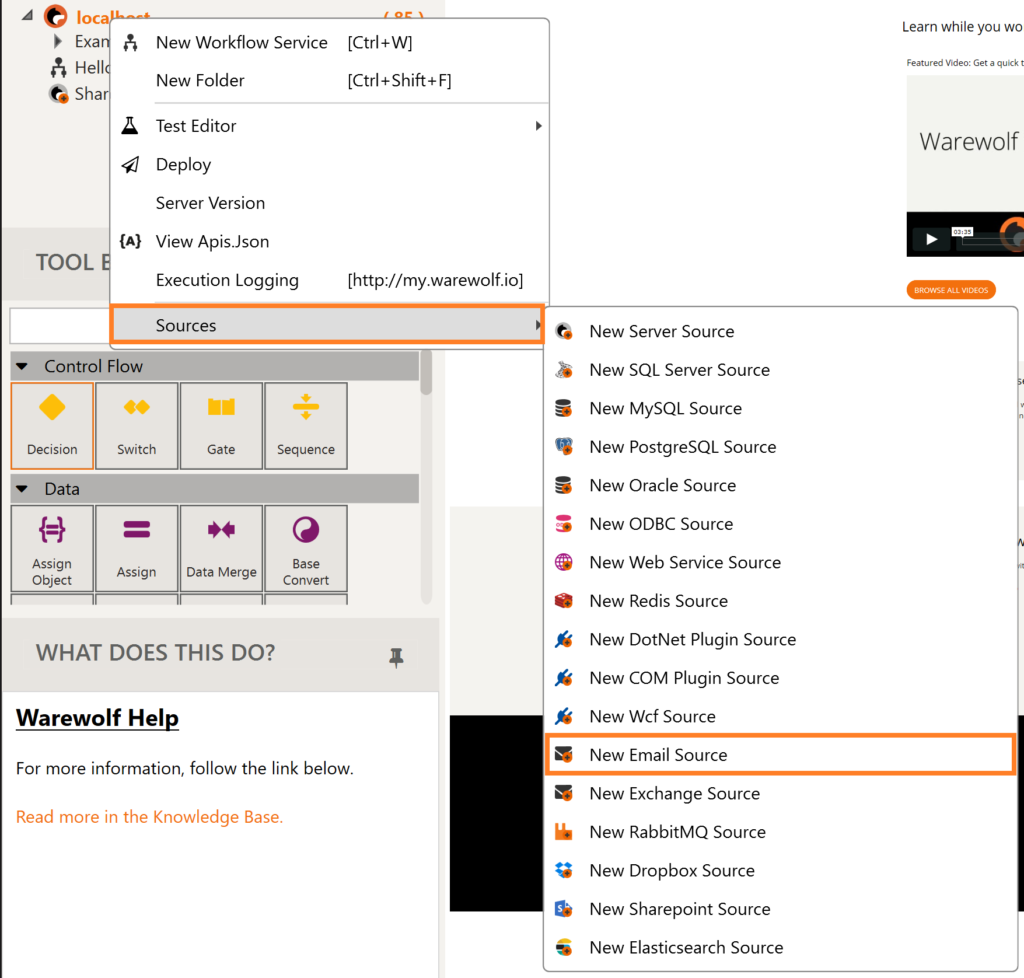
In this example, we will be creating a new Email Source inside Warewolf.
- Inside the Studio, right-click on localhost (Connected) in the Explorer, click on Sources and select New Email Source from the list.
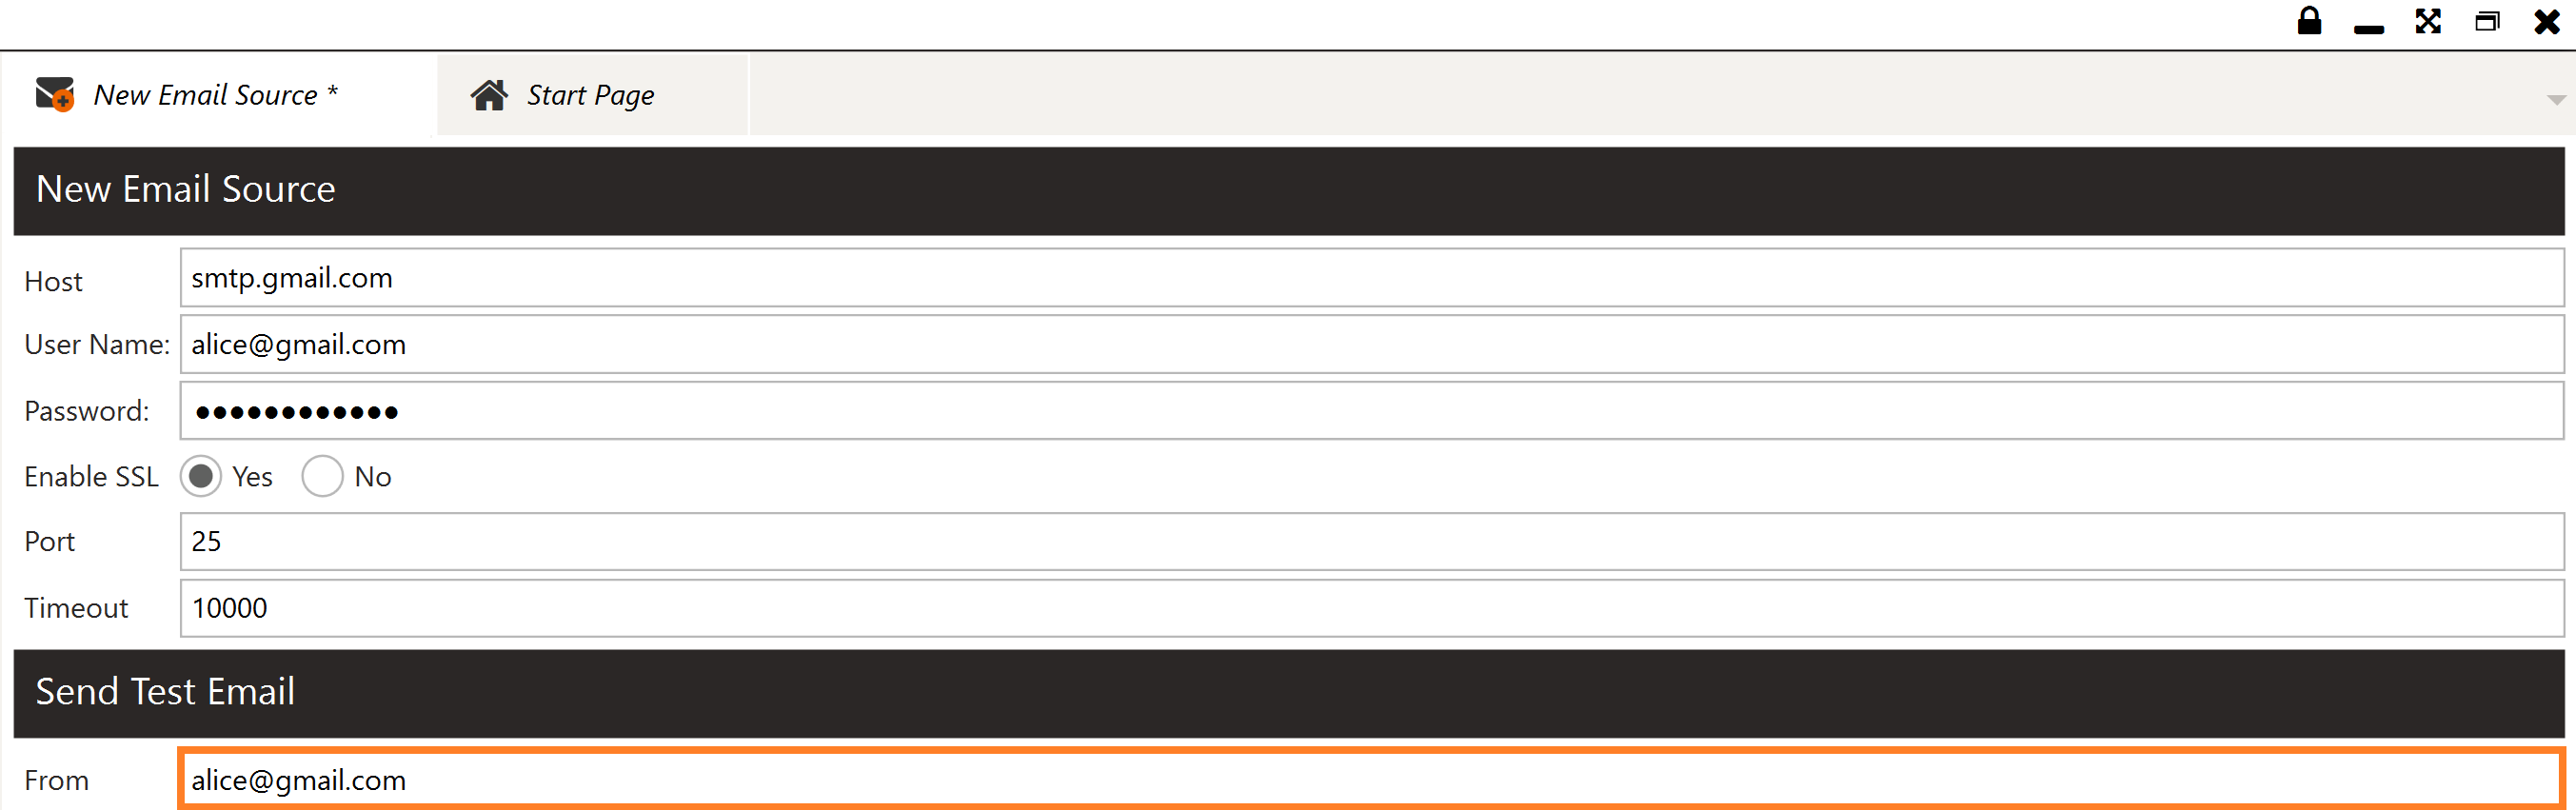
- Add the Host.

- Add the User Name of the account used to connect to this resource.

- Add the Password of the account used to connect to this resource.

- Enable SSL if your server requires it.

- Add the Port of the email server you are using.

- Add the Timeout allowed for the operation to connect before throwing an error.

- To send a test email, add the From email address that will be used to send the email.
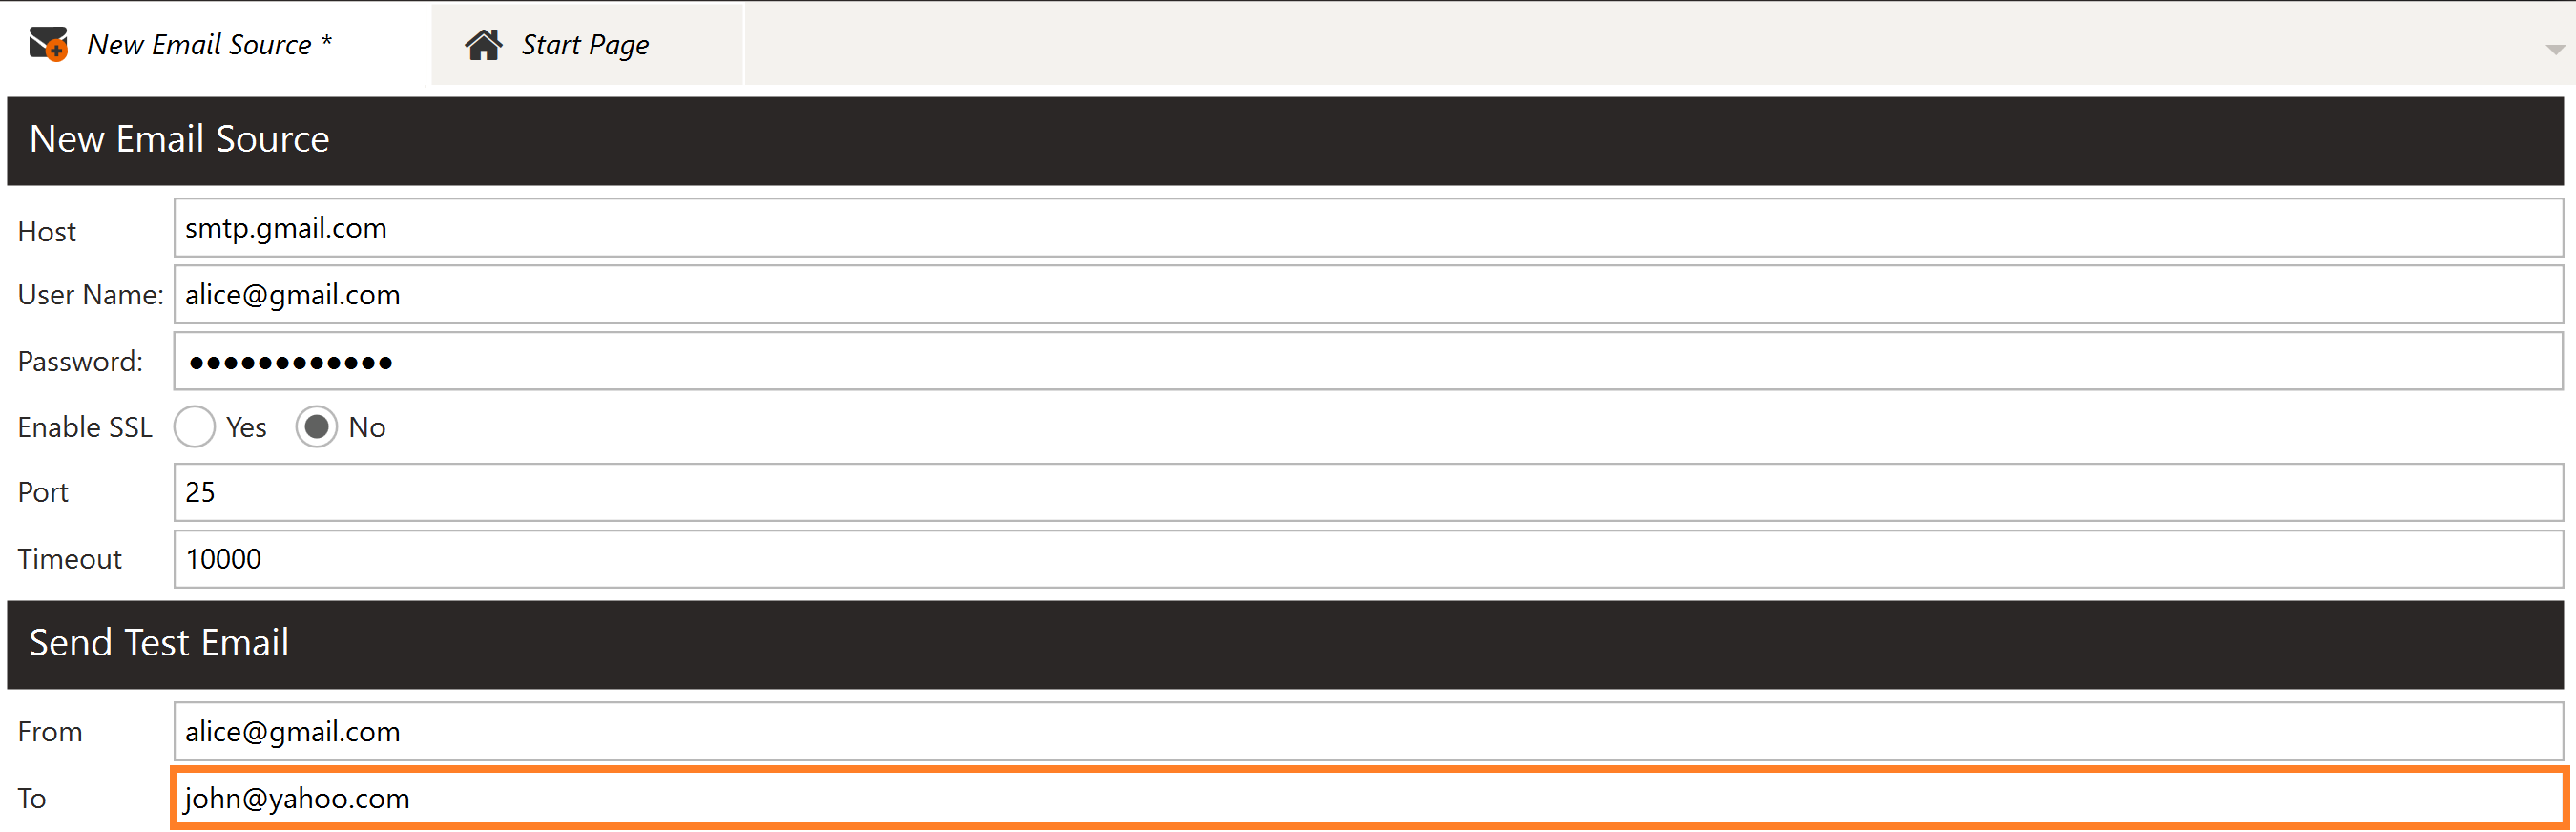
- Add the email address you want to send the test message To.
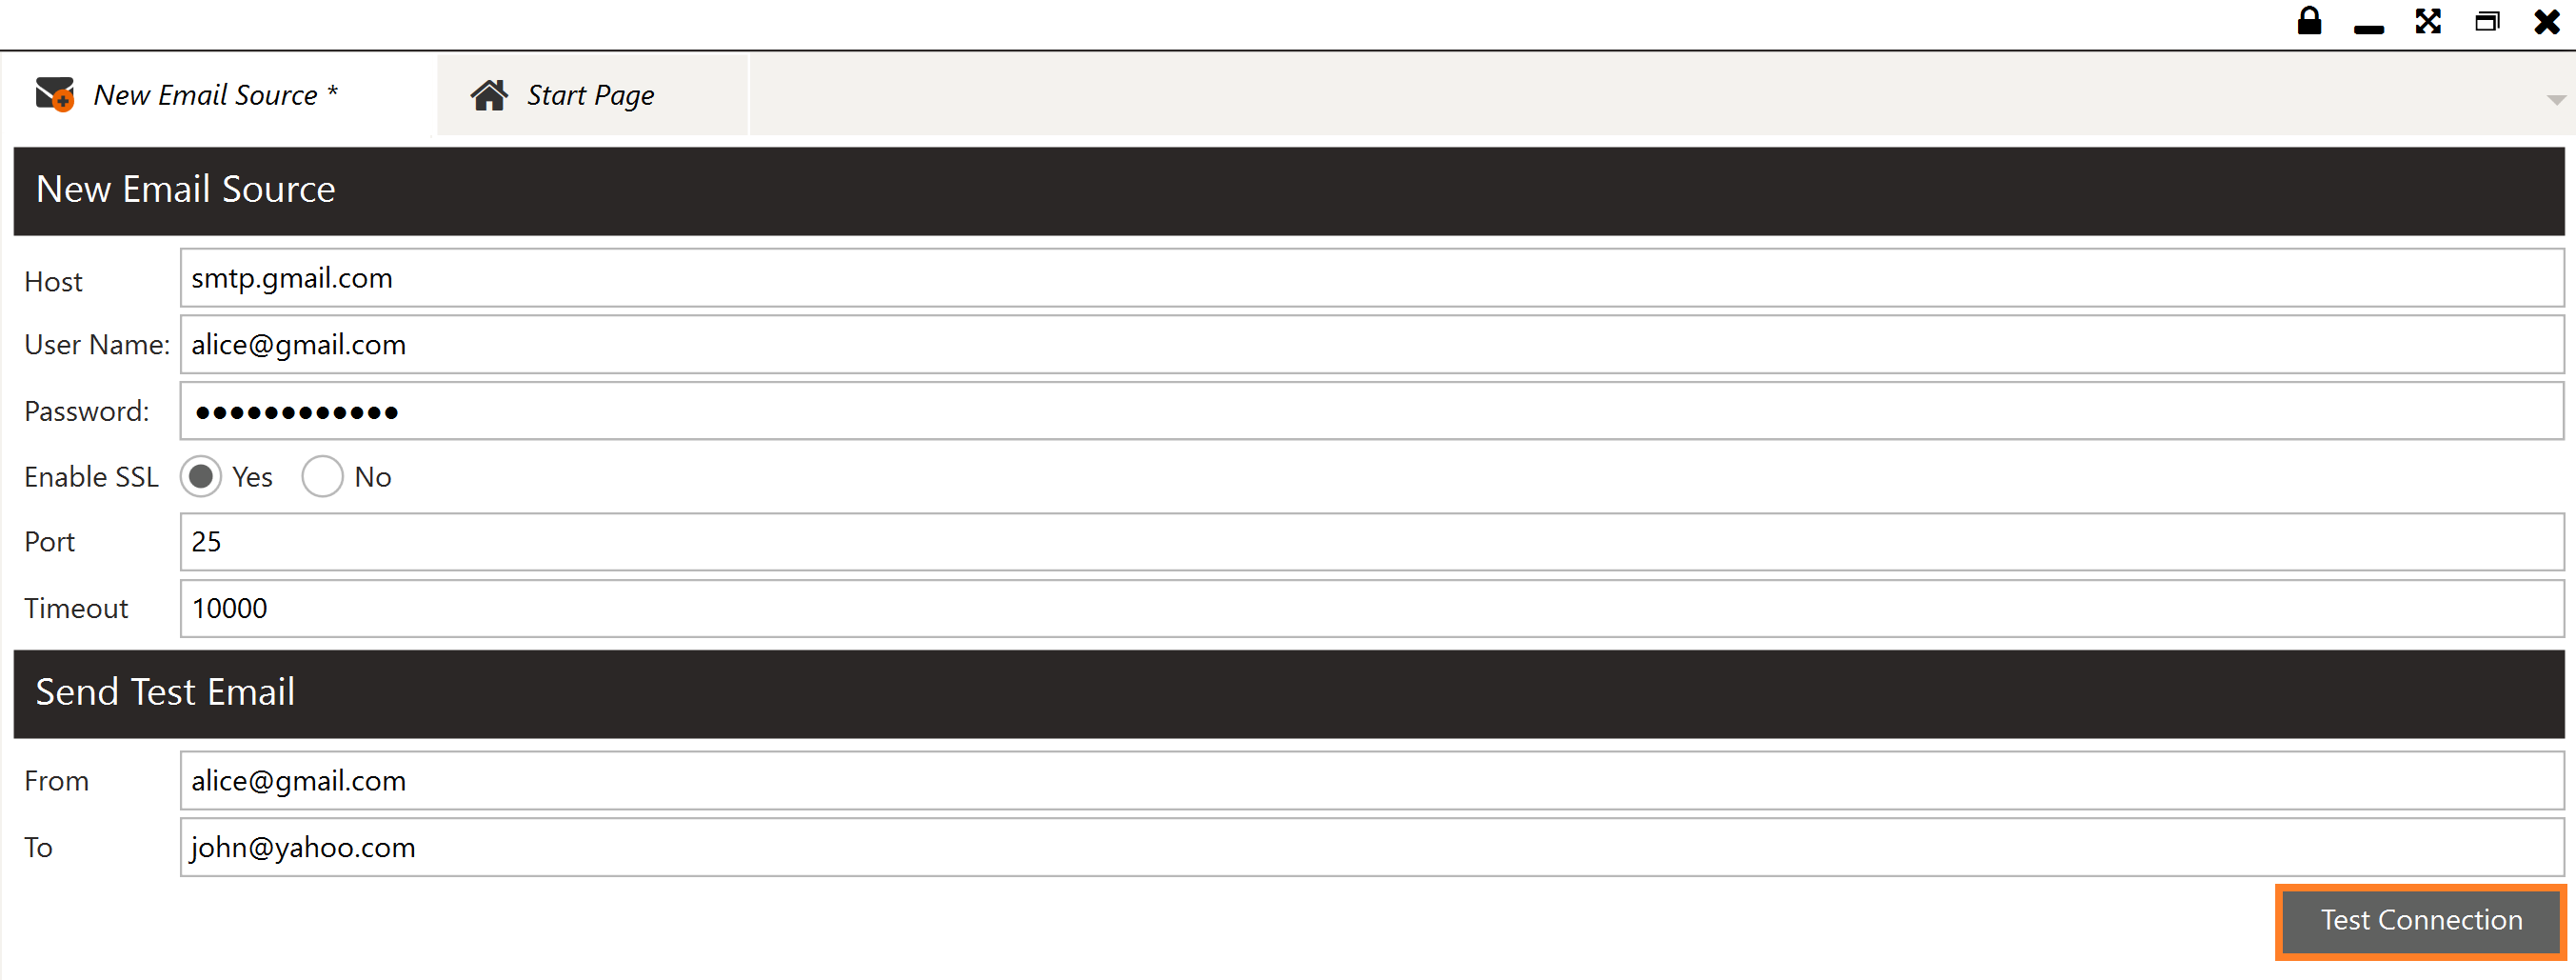
- Click Test Connection.
- Click Save in the menu on the left. In the pop-up dialog, name your Email Source and Save.