I always loved connecting things to make bigger systems and processes – I hated corporate integration, until now. If you tell anyone how easy it is to do software integration for two different companies or systems, they will not believe you and they’ll start waxing on about war stories we’ve all been involved in already. I’m going to show you how you can simply do software integration and add some future proof at the same time.
Why Integrate?
The cool thing about software integration between companies is that when it’s done, it saves huge amounts of manual work. It allows collaboration between business and systems. The downside (from a developer perspective) is it’s not ground breaking – it’s very mundane work that’s been done over and over again. You could say that everybody’s doing it – which defeats the point of technology.
Why does integration take so long in today’s modern tech world? There really is no excuse!
Tech should be an enabler, not a barrier. How can we integrate easily or better still, seamlessly? I’ll show you in the next few paragraphs.
How Do We Integrate?
APIs are helpful when they exist if the documentation is simple and straight forward, but again, there is lots of work in getting them up and running from a user perspective. Not to mention the maintenance and co-ordination on the backend. Typically it’s not the core business of the company so there is atrophy over time from a code and documentation perspective.
Enough B2B bleakness. Here is what you have been waiting for…
Simple Future Proof Integration
I’m going to quickly show you why you should host a Warewolf Easy Service Bus (ESB) and why you should refuse to do software integration with anything else. You can download Warewolf ESB here.
Integrating with a company that hosts a Warewolf Server is as simple as this:
This walk-through assumes you have Warewolf installed and have a local service that retrieves the data needed in Step 4. If you do not have a service to do this, you can always pass the data into the workflow by marking those fields as Input in the variable list.
- Connect your Warewolf ESB to the remote Warewolf ESB
- Click New Remote Server in the Explorer drop down

- Fill in the Server Address and Authentication based on what you have been given by the company (We will use the Shared Resources Server for this example – with a different Saved name)
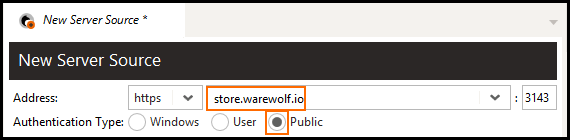
- Click Save
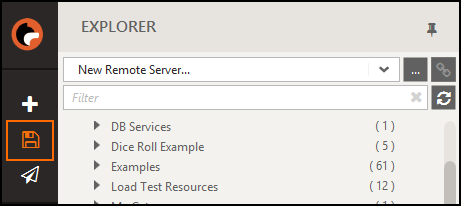
- Give the resource a name and click Save.
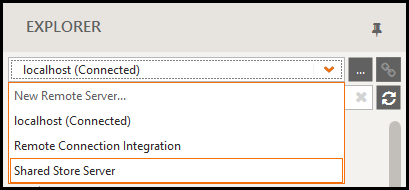
 (NOTE: Now that you have established a connection to this server, you can use the resources that are made available for you on it by simply selecting it in the Explorer and clicking connect. Warewolf will take care of the connection and authentication for you.)
- Click New Remote Server in the Explorer drop down
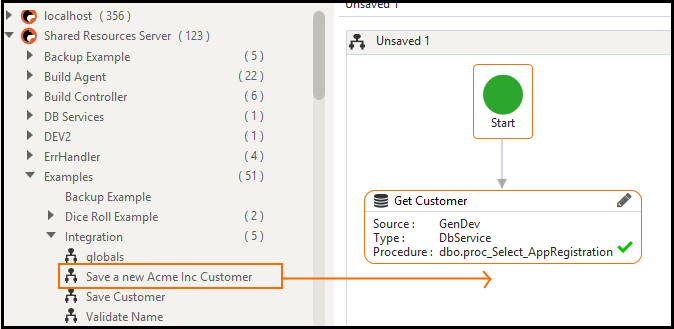
- Locate the resource in the Explorer on the saved server that you want.
- Select the remote server you want to use
- Browse and find the resource on the remote server
- Select the remote server you want to use
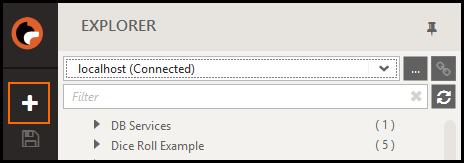
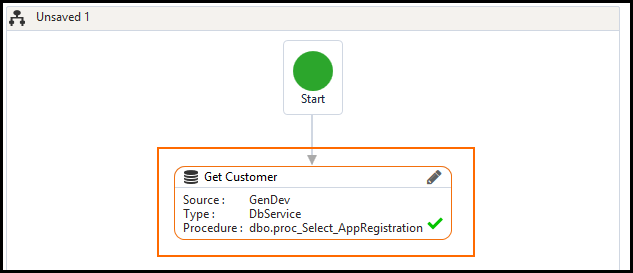
- Add a New Workflow Service on your local Warewolf by clicking the New Service button
- Call a local service (database stored proc, web service, DLL etc.) to get the data you want to send to “Acme Inc.”
- Drag and drop the resource from step 2 into place on your local workflow service.
- Map your data in ([[Name]] and [[Username]]) and out ([[Response]])
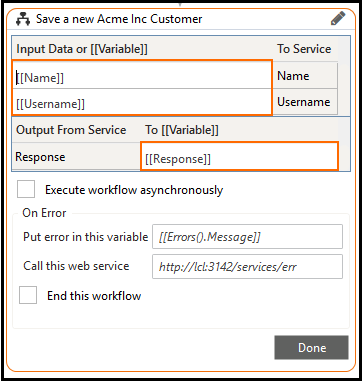
- Test your workflow service by pressing F5 and following the on screen instructions
You have now integrated with one of their services. Warewolf will connect, authenticate, pass the data, execute the remote service and return the response any time you use this local service!
You can (and probably should) extend this service to have some sort of error checking after sending the data to “Acme Inc.” I have used a simple example to show how easy the process is.
Let’s take a look at what the company hosting the Warewolf server would have to do to setup this type of service.
- Install Warewolf on a web facing server or forward traffic from a particular port to their Warewolf Server.
- Build the service to receive or send the data or reuse existing services and procedures. (Open the service up to see what it does by either double clicking in the Explorer or pressing the Edit icon on the design surface:
 )
) - Set up the security permissions to allow access from the outside
If only all integrations were this simple! Well they can be. Go ahead, give it a try and let us know how you get on in the Community Forum.
Future Proofing by Design
The bonus for the host is that they can quickly convert current resources to Warewolf Services AND they can change their logic and internal process without affecting the customers, also they can get back to their business and not the business of integration. The custom benefits are similar as the time investment is greatly reduced and ongoing management is more in the hands of the host than them. They can also quickly discover and use all the services provided by the host, but that’s for another day.
It’s seriously that easy! Both the customer and the host have very little work to do as Warewolf takes care of the heavy lifting.
Happy integrating.


Leave A Comment?