Warewolf Queue Triggers is the best solution when you are looking to trigger one of your services whenever there is a new message in the RabbitMQ Queue.
Eg: send an email to your customer as soon as their order is ready for collection.
Warewolf Queue Triggers utilizes the RabbitMQ server as it’s queue driver.
Creating your first Queue Trigger
Create a service called client_order_ready-trigger_queue using the Warewolf Queue Trigger Publisher Example that publishes a message to the client_order_ready-trigger_queue which in this example will be the message coming from the service doing the work.
This message will be listened to by the Warewolf Trigger: await-client_order_ready-trigger created later in this article.
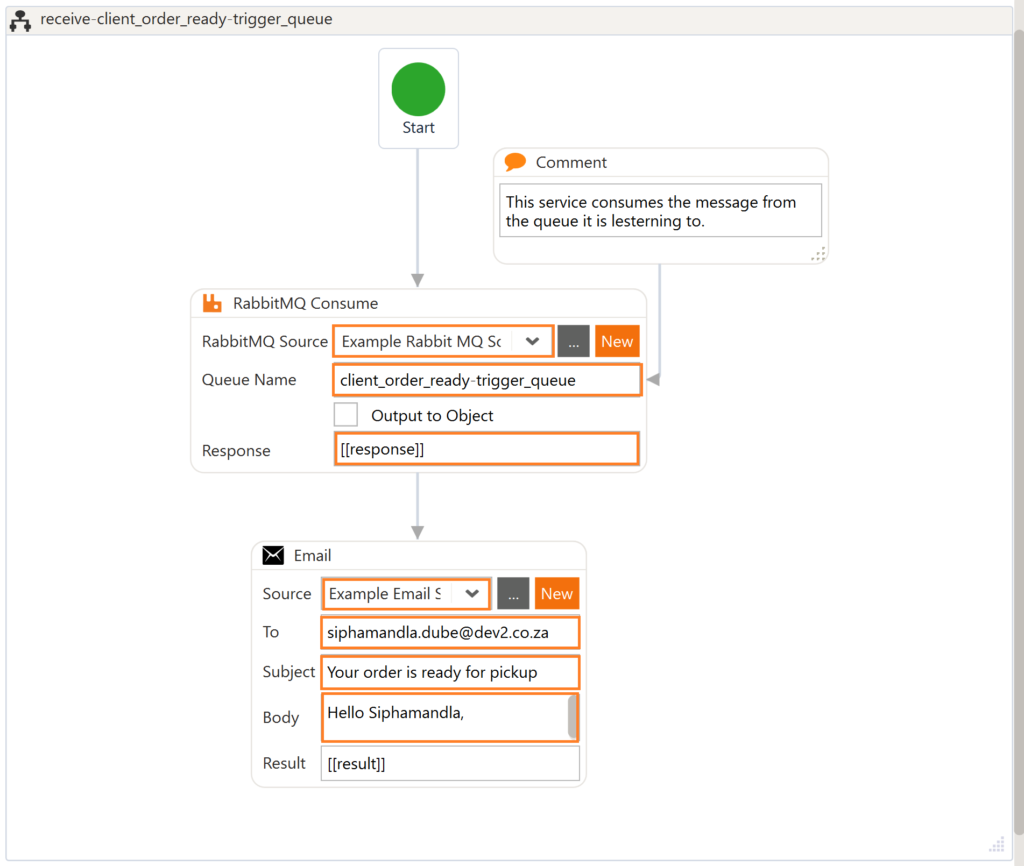
When this message is received, the trigger will call the service: receive-client_order_ready-trigger_queue set in the trigger editor.
This service will now be responsible for sending the email to your client when the order is ready for collection.
Enough theory let’s look at this in practice.
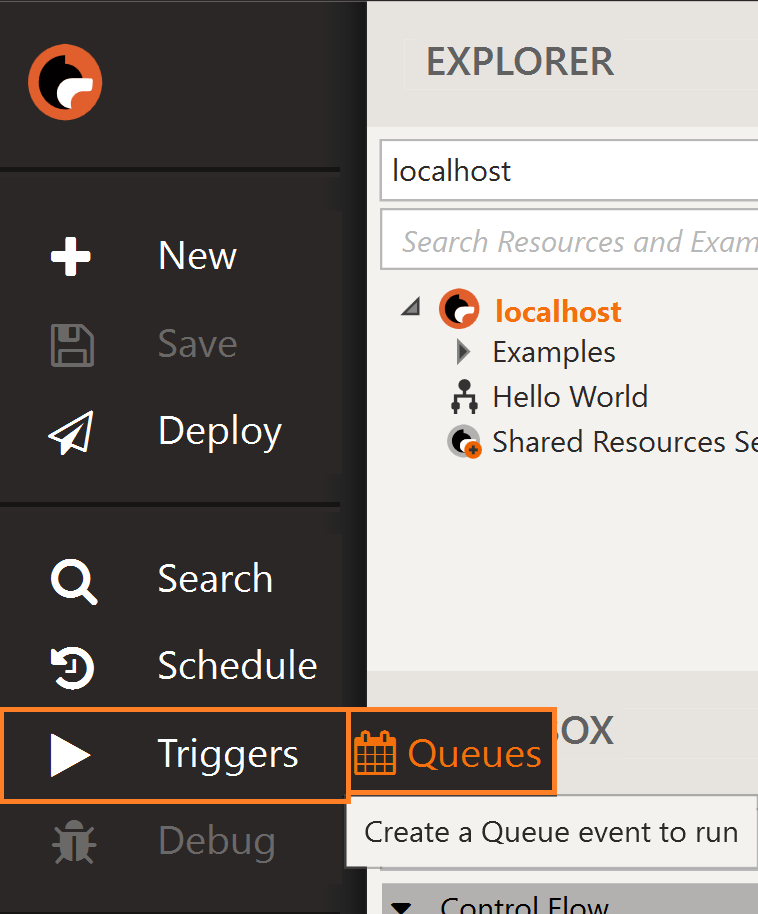
- From the sidebar of your studio select Triggers and click on Queues

- Click Create a new queue to add a new Queue Trigger

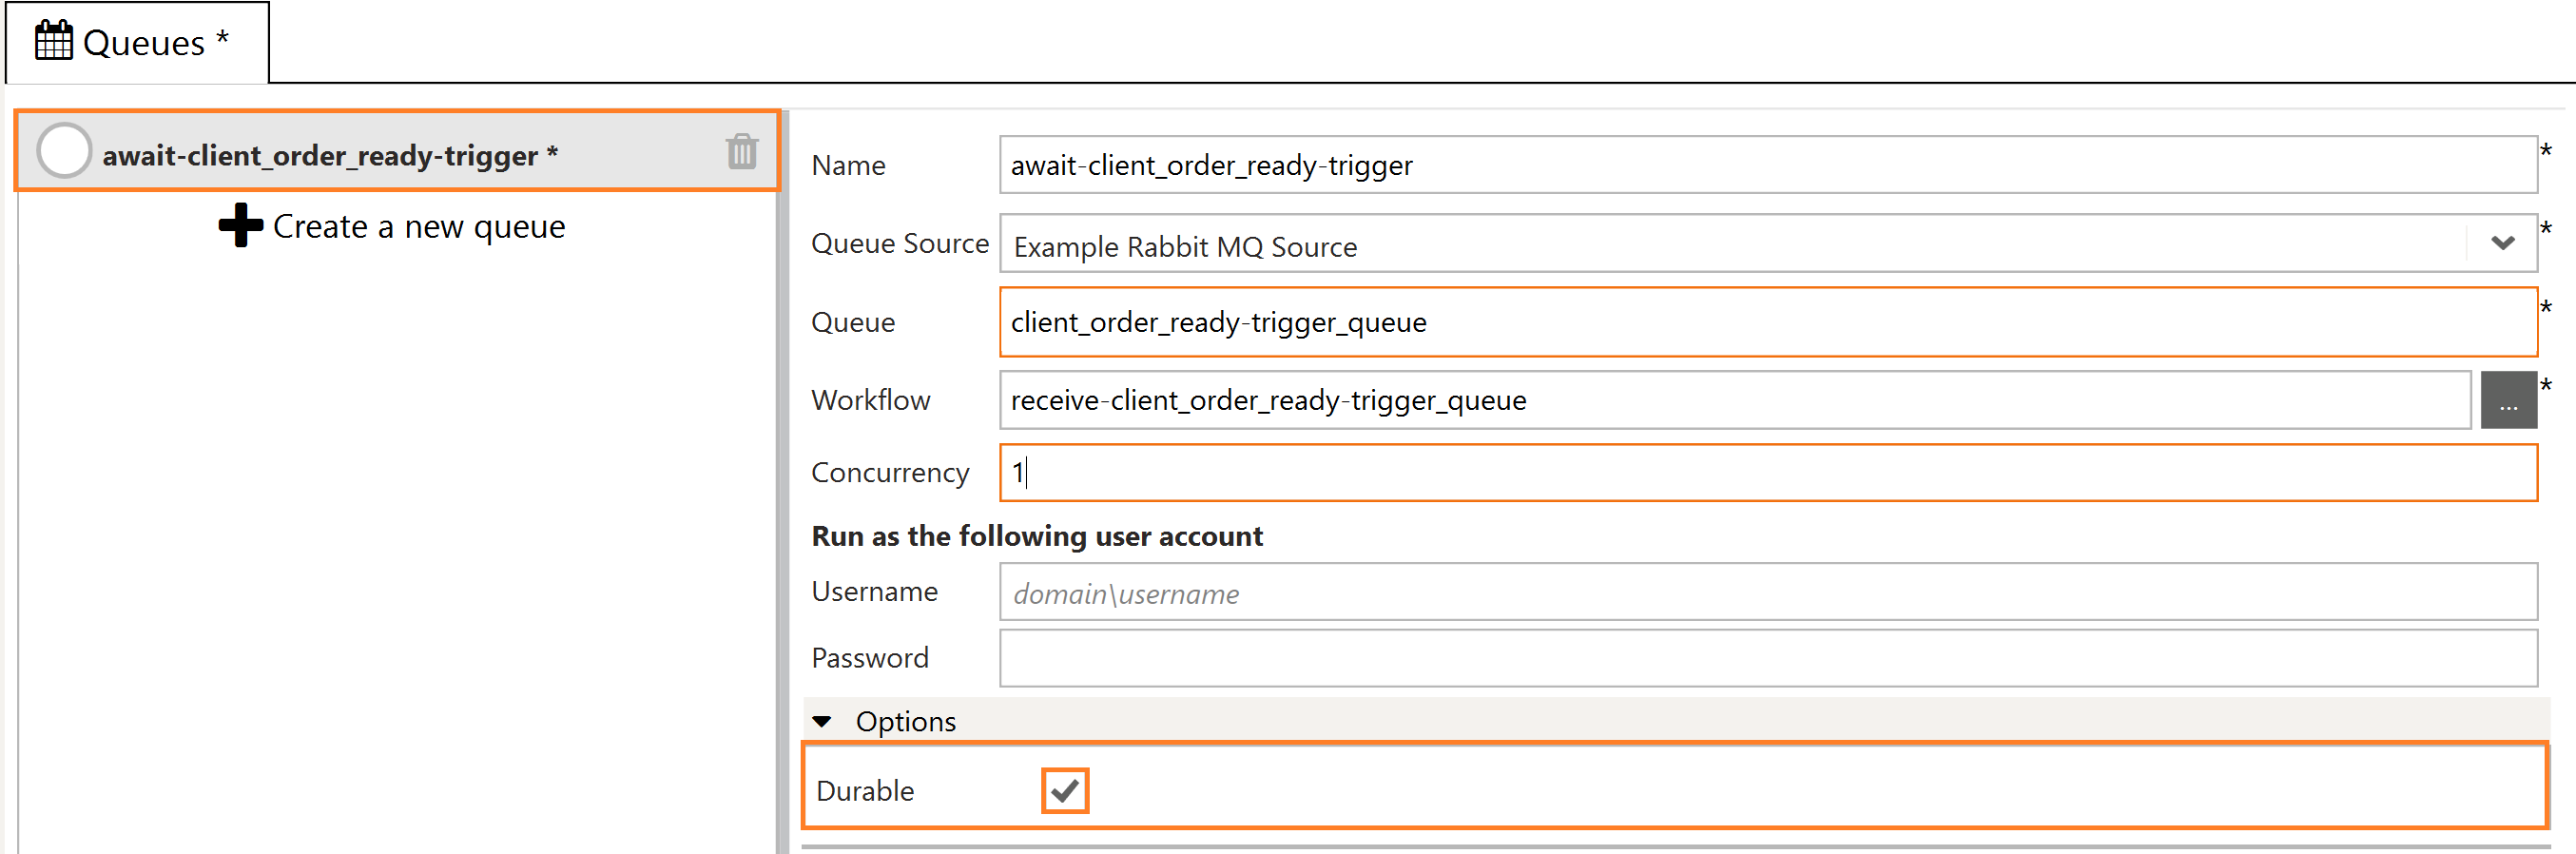
- Name your Queue Trigger any name you want in this example: await-client_order_ready-trigger

- Select Example Queue Source similar to the example found in the article Creating a Rabbit MQ Source

- Add Queue name receive-client_order_ready-trigger_queue that is set-up in Warewolf Queue Trigger Consumer Example

- Set Concurrency to 1. When you decide you want to stop the Queue Trigger event but still keep all your settings, you can change your Concurrency to 0.

- Run as the following user account
Set the username and password used to execute the workflow above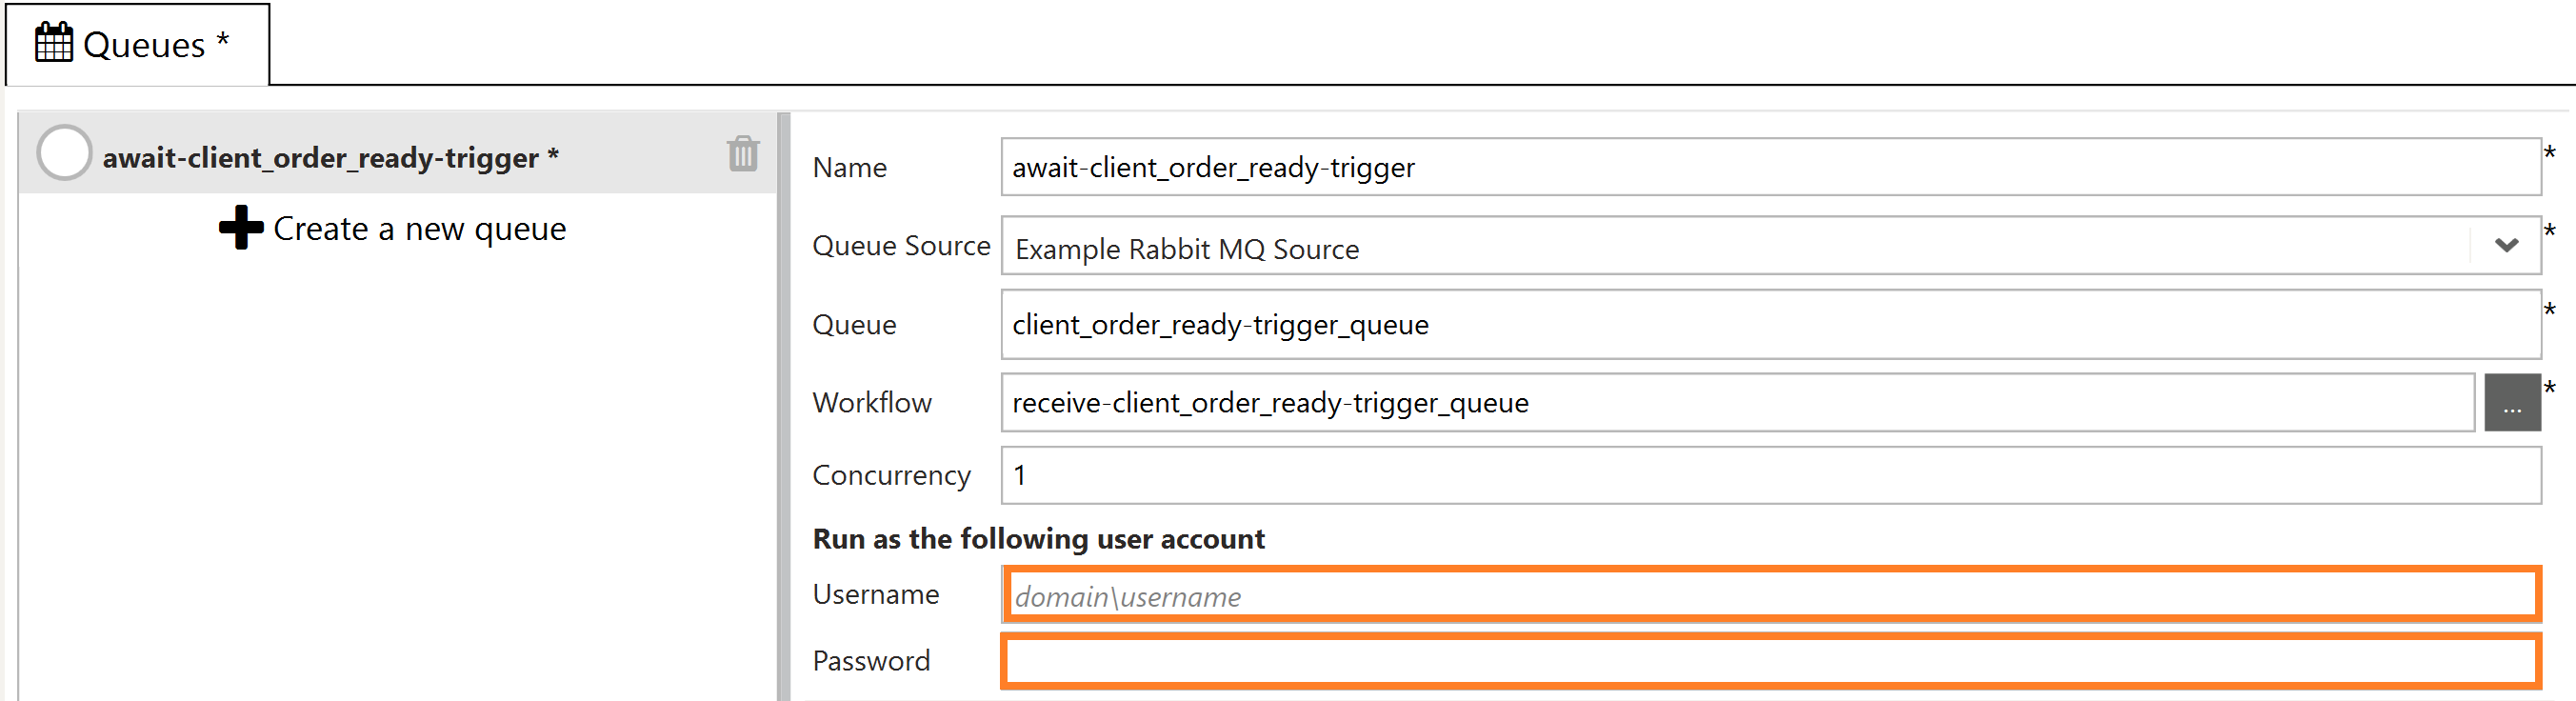
- On Error
To find out more about On Error consider article: Warewolf Queue Triggers
Here we set Queue Source same as above and Queue as await-client-order_ready-trigger-dead_letter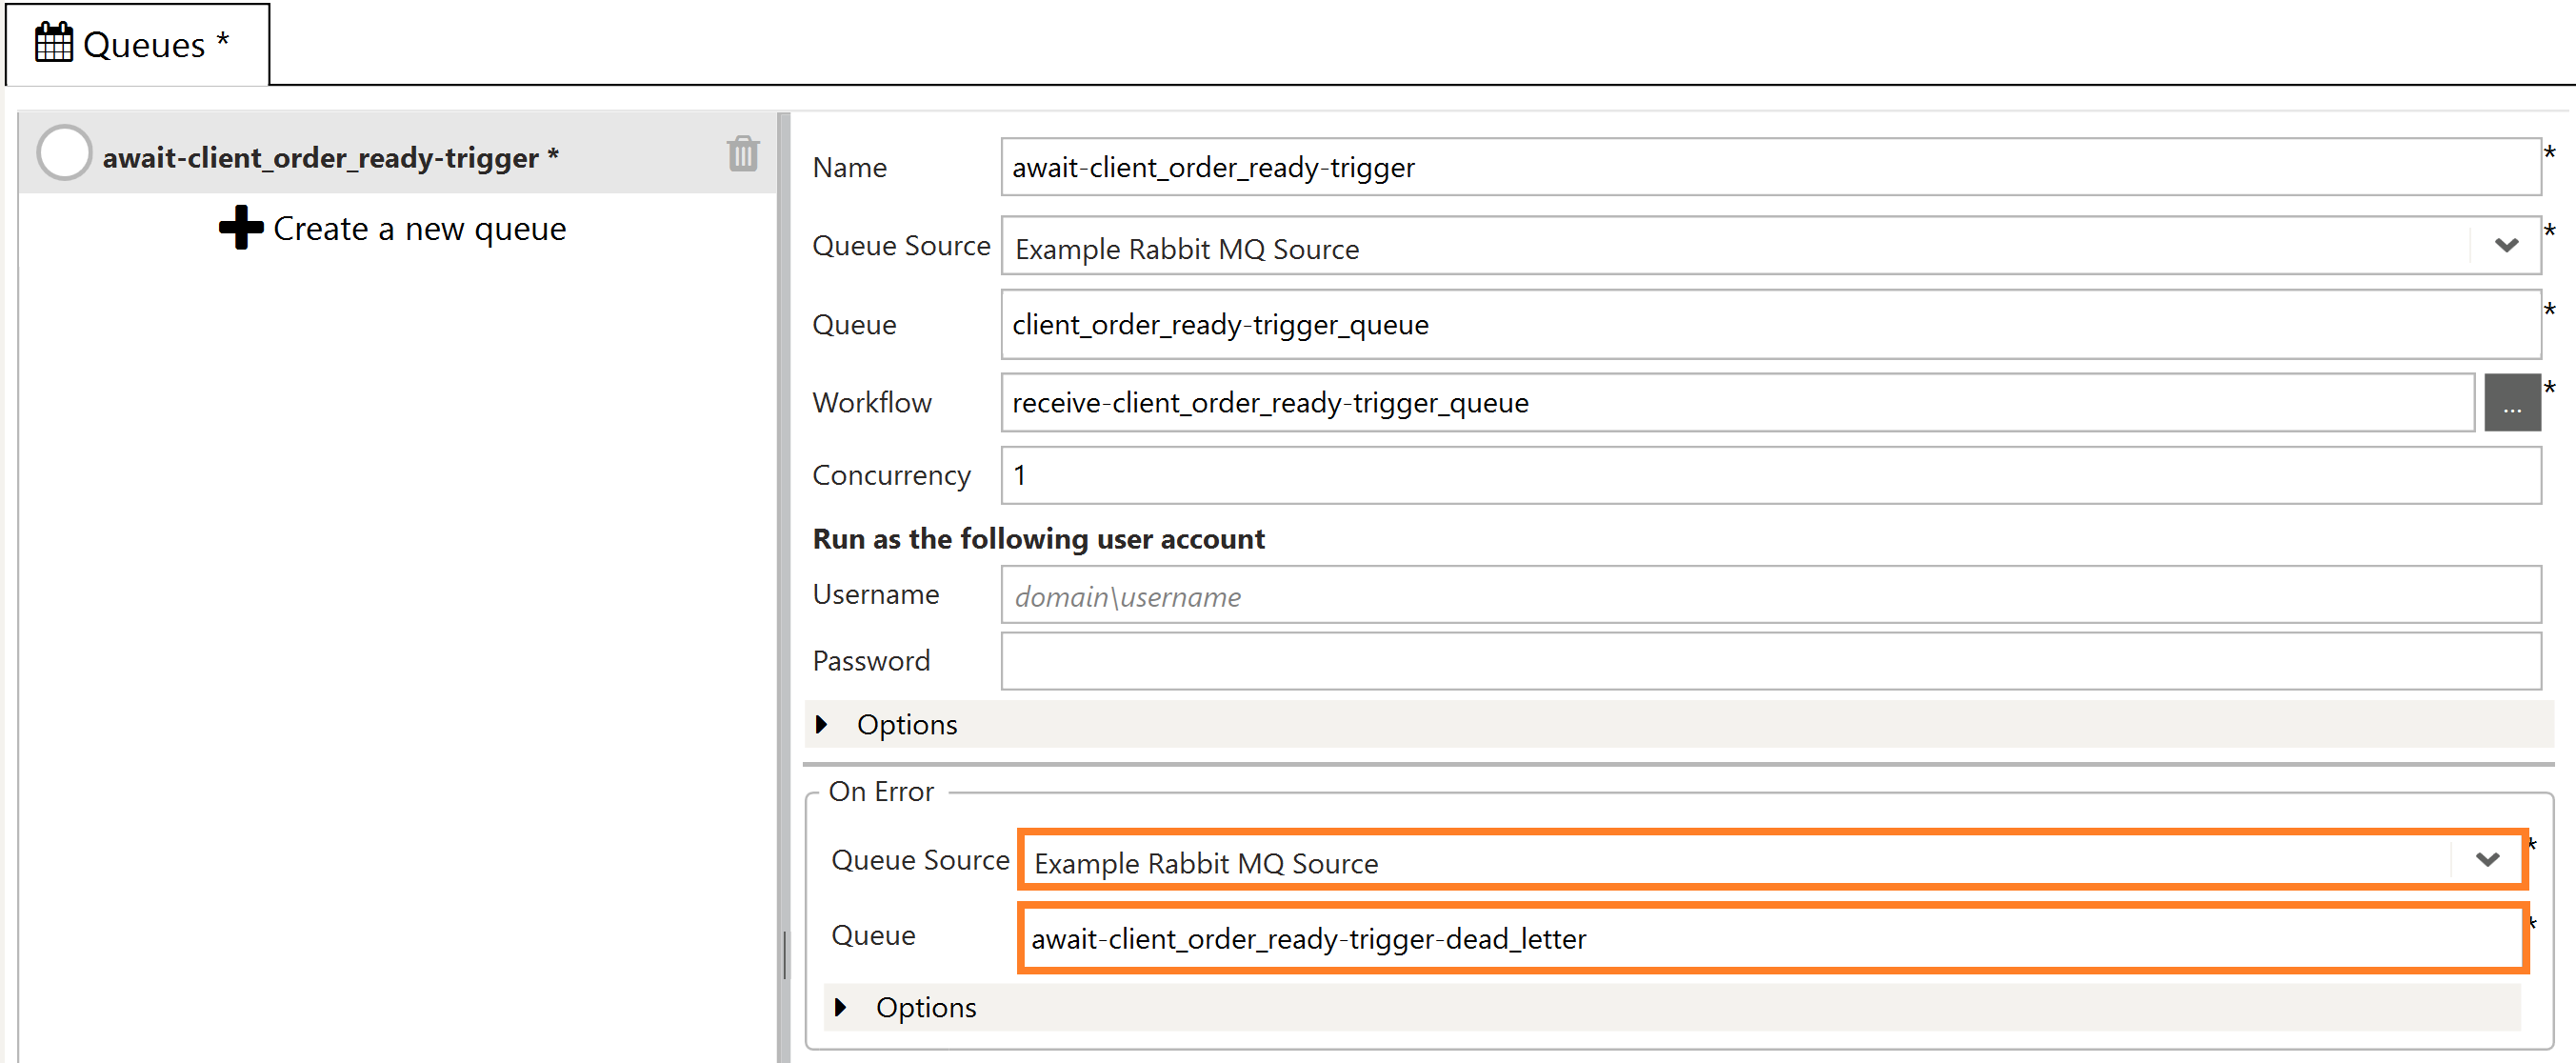
- And finally, your settings should look like below:
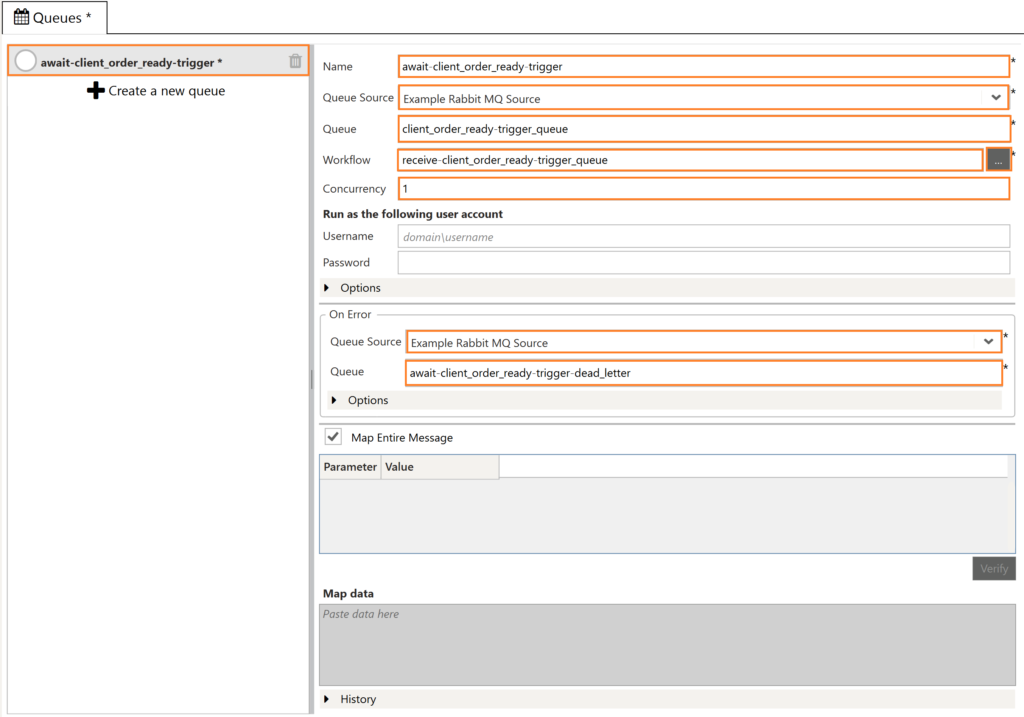
- Now click Save
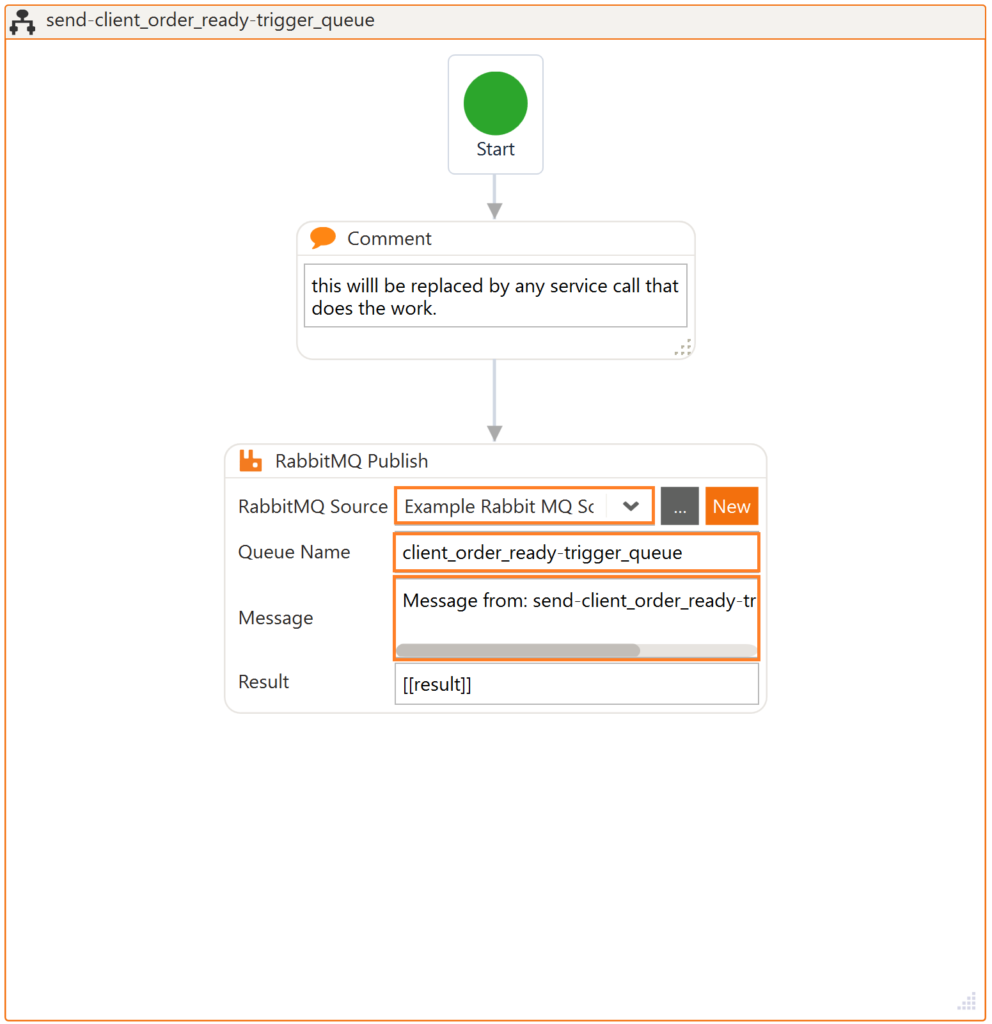
- Now we need to fake our worker service named: send-client_order_ready-trigger_queue message setup as below.
- As explained above the trigger will now call the workflow named: receive-client_order_ready-trigger_queue setup as below.
With all the above-highlighted changes the above example should send an email to the email account you have added above.


Note on Durable:
If the service we named: send-client_order_ready-trigger_queue publishes a message to a Durable configured queue, this “await-client_order_ready-trigger” , as setup herein above step 1 – 11, will also have to be set into the same Durable setting as the message send workflow.
Figure 4.1: “send-client_order_ready-trigger_queue”
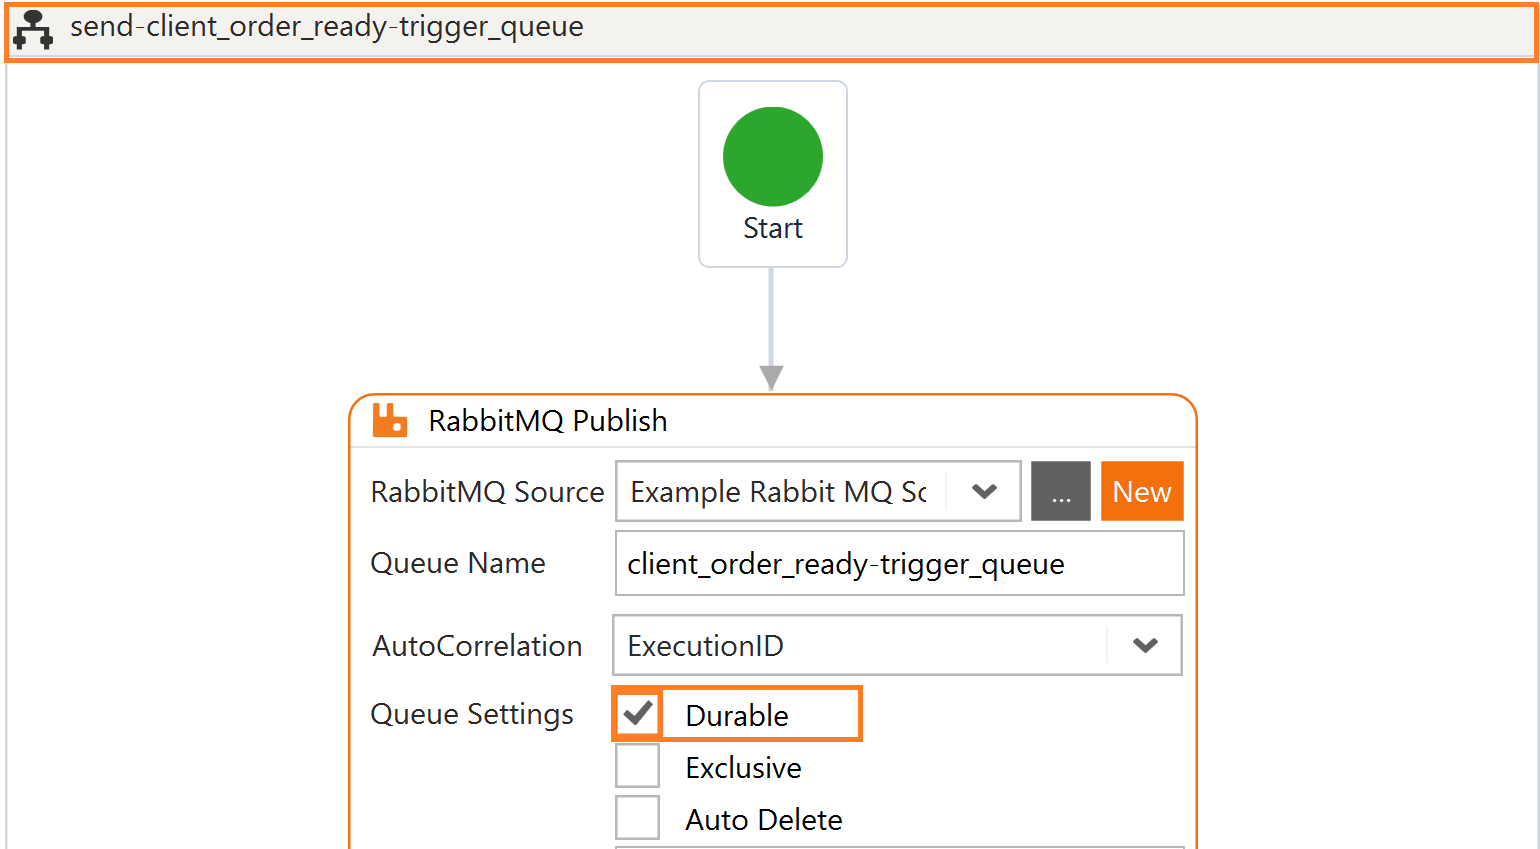
Figure 4.2: “await-client_order_ready-trigger”
For more information on what the Durable setting is for and/or when to use it, please refer to the RabbitMQ documentation.