Comma Separated Value (CSV) files are often used as a way of storing structured data by separating each field value by a comma. You can easily create a CSV file in Warewolf using the pre-built tools and connectors in the toolbox. Follow the steps below to create a CSV file in Warewolf:
-
- Create a new service by clicking the New button in the main tool bar on the left.

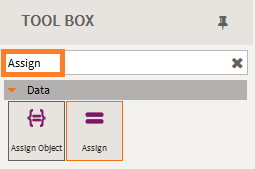
- Search for the Assign Tool in the Tool Box. Drag and drop the Assign Tool onto the design surface.
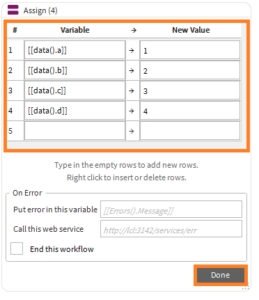
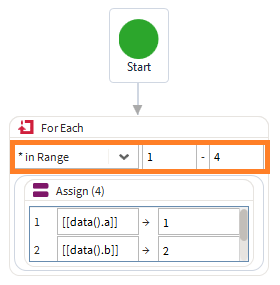
- Open the Assign Tool into large view by double clicking the header section of the tool. Assign values to your variables and then click Done. The large view will now close.
- Search for the For Each tool in the Tool Box and connect it to the Start Node on the design surface.
- Drag the existing Assign and drop it into the For Each tool where it says, “Drop Activity Here”. You can then select a specific set of indexes to be specified by range, CSV, no. of executions or every index in the given recordset.
- Select *in Range, add in the new assigned values (in this example, 1–4).
- Search for the Data Merge tool in the Tool Box and connect it to the For Each
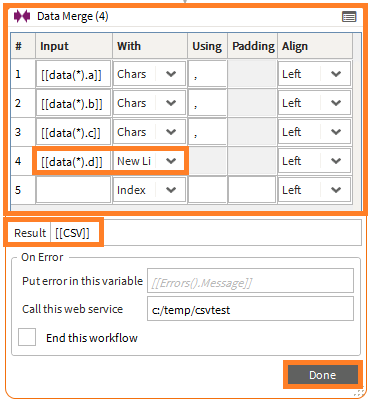
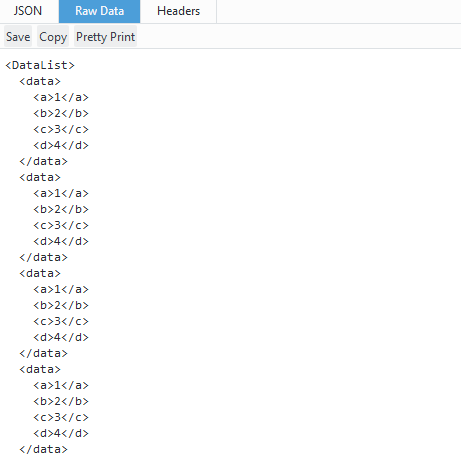
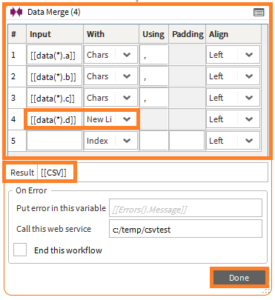
- Double click to open the tool in large view. In the Input field, enter the variable data that you set in the Assign tool in Step 3. Select Chars in the With Column and add a comma (,) in the Using Select Align to the left. For the last record in the Input field, you will need to select New Line in the With field. This will create a new line for your next row of data.
- In the Result Field, name your Result [[CSV]] and click Done.
- Drag and Drop the Write File tool onto the Design Surface and connect it to the Data Merge
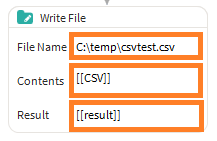
- Type in the name of the full path and file name in the File Name. In this example we are using c:\temp\csvtest.csv. Do not forget to add the .csv to the end of the file name.
- In the Contents field add [[CSV]]. This is the variable specified in the Result field of the Data Merge.
- Add [[result]] into the Result field.
- In the Variables list, mark the data recordset items as Output.
- To Debug in your browser, press the shortcut key F7.

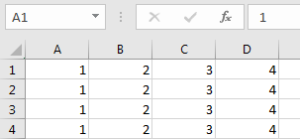
- Your CSV file will be in the location in which you assigned it to in the Write File tool. To access it, go to your Windows Explorer. Find your C: Drive and the folder and open it. It should be in an Excel format or depending on the default programme on your computer that can read CSV files.

- Click on the file and it will open in Excel.
- Create a new service by clicking the New button in the main tool bar on the left.